Setting up IPv6 on AWS
I used to think that IPv6 is mostly a concern for ISPs and hosting companies to enable and once they do, everything in their system will start using it. Turns out, it isn’t that simple. How the internet hasn’t really felt much of the effect of this is a little beyond me because IPv4 exhaustion occurred at the beginning of 2011.
By default,
AWS does not enable IPv6
First, does your computer support IPv6?
You might be surprised to realize your computer and home network isn’t setup for IPv6. So before you start changing your entire cloud setup, check to make sure.
If you find you do not support IPv6, you should next check to make sure your modem and router support IPv6. The standard was originally written in 1998, so most devices should have support for it but it might not be correctly enabled by default.
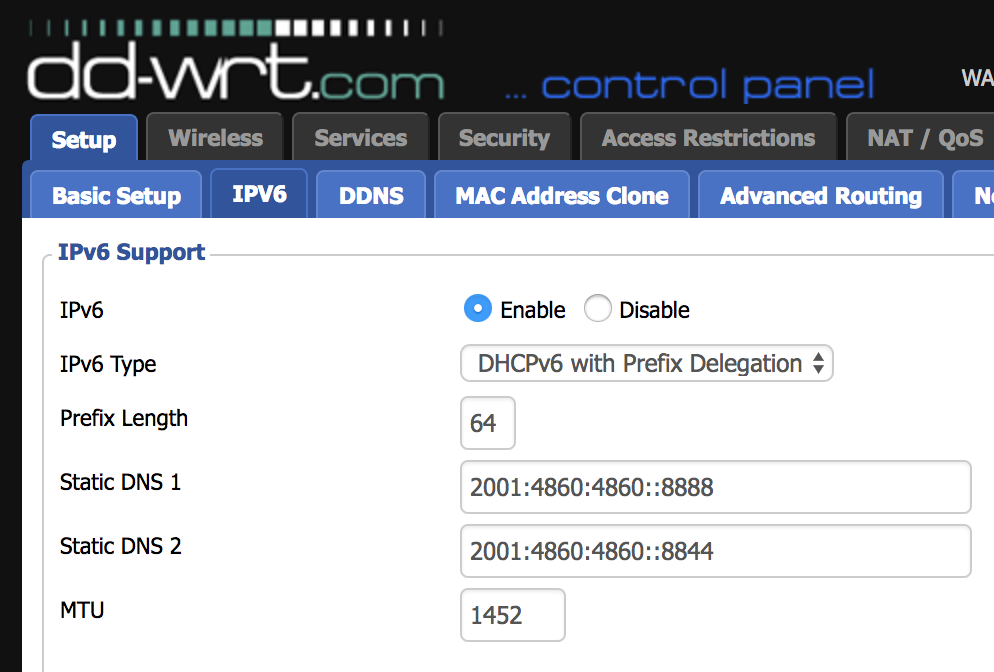
The normal ipv6 roadblock is your router as most modems are mostly auto-configured by the ISP. So first check your router to see if:
- Make sure IPv6 is enabled on the router
- If it is enabled, but you are not getting an IPv6 address, check to see if the router is using Native IPv6 from ISP and try switching it to DHCPv6

You may need to specify an IPv6 DNS lookup (Google DNS IPv6)
- 2001:4860:4860::8888
- 2001:4860:4860::8844
Now, try ipv6-test and see if you pass.
Setting Up AWS to Receive IPv6 Traffic
Now we can start changing settings in AWS to enable IPv6. You have to complete all the steps before you can test IPv6 access to your cloud.
Essentially you need to tell Amazon that you need an IPv6 public block that you will start assigning to your EC2 instances.
- VPCs
- In AWS Console Services menu goto VPC
- Right click on the VPC and click Edit CIDRs
- Click Add IPv6 CIDR
- VPC Subnet
- In the VPC Dashboard, on the sidebar select Subnets
- Right click on each subnet (often one for each availability zone enabled) and select Edit IPv6 CIDRs
- Click Add IRv6 CIDR and use the default value (it will auto increment so each availability zone is none overlapping)
- Click the checkbox to accept and then click close
- VPC Route Table
- In the VPC Dashboard, on the sidebar select Route Table
- Click on the route table that matches your VPC and on the bottom tab select Routes
- Click Edit
- Add ::/0 and target it to your internet gateway (you should have an ipv4 version and it probably starts with igw-)
- Click Save
- EC2
- In AWS Console Services menu goto EC2
- Right click on the EC2 node you want to add IPv6 to and select Networking > Manage IP Addresses
- Click Assign new IP
- Click Yes, Update
- (repeat on any other nodes you want to add ipv6)
- Security Groups
- In the EC2 Dashboard, on the sidebar select Security Groups
- Add ::/0 entries for any IPv4 public entries
- Example of a HTTP/HTTPS server with ping replies enabled

- DNS AAAA records
Testing
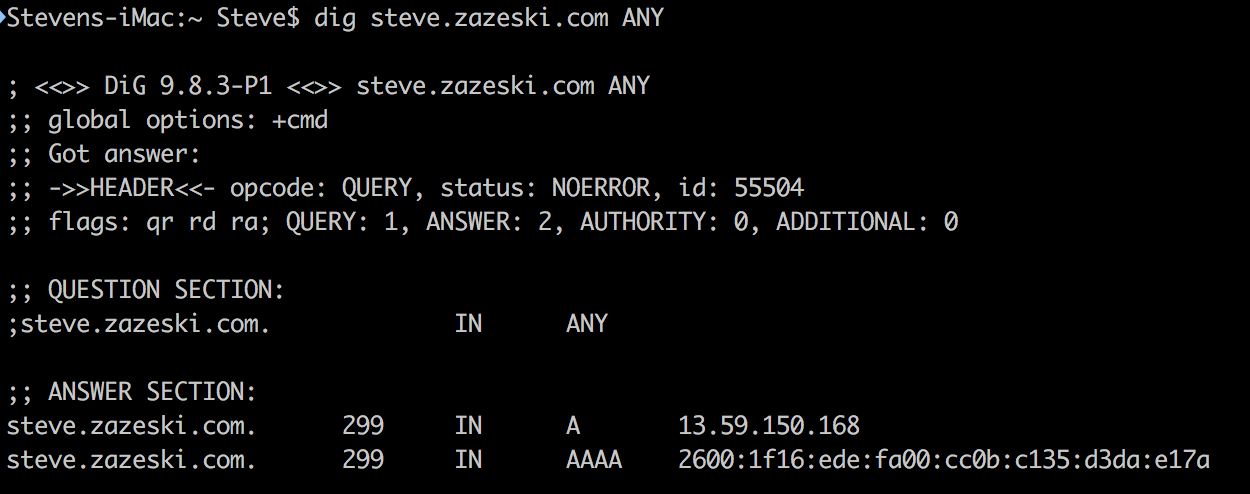
Instead of using ping which will send an ICMP request over IPv4, you need to start using ping6. If you are getting hostname lookup troubles, then transition over to
dig <hostname> ANY
If you don’t see both A and AAAA records, then you either need to wait for DNS propagation or check to make sure your records are showing by your DNS provider.
> ping6 steve.zazeski.com
ping6: getaddrinfo -- nodename nor servname provided, or not known
If your DNS records are working, then you need to make sure the above IPv6 route table is actually being used and that a security group isn’t stopping the message. For troubleshooting, try adding a relaxed any inbound connection security group (just make sure to remove it when you are done troubleshooting).

