Setting up API Gateway Endpoint showing User IP
If you are looking to get started in serverless, a common endpoint that I like to add is /ip that returns the requester’s wan address. It’s helpful when creating firewall rules and I see it like a hello world app that has some practical uses. In AWS API Gateway, I quickly ran into issues getting this to work and finally figured it out.
This will start off creating an entirely new API but if you have an existing one already, jump ahead to the Custom Custom Mapped Request section.
Creating a new API
https://us-east-2.console.aws.amazon.com/apigateway
Goto the API Gateway service and click the Create API button in the top right.
Find the Rest API (not private) and click Build button
Enter a name (this only appears in the console)
Select either Regional (fast deployment and a good choice for development/testing) or Edge Optimized (uses Cloudfront, new deployments will be slower, but if you are trying to improve speed for a large regional audience, definitely the way to go)
Creating a Custom Domain API
If you want to have a custom domain name (i.e. api.checkssl.org) then before you setup the custom domain in API Gateway, you will need to generate an SSL certificate for this domain.
https://us-east-2.console.aws.amazon.com/acm
Select Request a certificate
Select Request a public certificate
Enter your desired url (i.e. api.checkssl.org)
Select DNS validation
Skip tag (unless you use them for organizing)
Click Confirm and request
If your DNS is in Route53, just click the Create record in Route 53 otherwise log into your DNS and add the CNAME record.
In the AWS console, goto API Gateway
Select Custom domain names
Select Create
Enter the domain name you created a certificate for, and select it in the ACM certificate drop down.
Click Create domain name
(FYI, at this point, you will have a custom domain API but no API mapped to it, we need to run a deployment and create a stage before we can map it)
Creating Custom Mapped Request
Finally, we can start building out the endpoint. Before we create the endpoint in API Gateway, let’s create a stub lambda function because you will need it as soon as you create the endpoint. I recommend just having multiple tabs keeping Lambda and API Gateway open so you can toggle between them.
Jump over to the Lambda dashboard and select the orange Create function
Enter a name (this will only be visible in the aws console)
Select the default Node.js 12.x runtime (you can use any but the code I’ve done is in JS)
Select Create Function
Now jump back to the API Gateway
Select APIs and pick the new one created.
Click on Actions and select Create Resource
Enter a resource name like ip and set a resource path like ip
Enable API Gateway CORS (you can also turn this on later, its important only if you plan to do JS ajax calls to this endpoint)
Click Create Resource
Go back to the Actions menu and select Create Method
Drop down the list and select GET and click the checkmark button
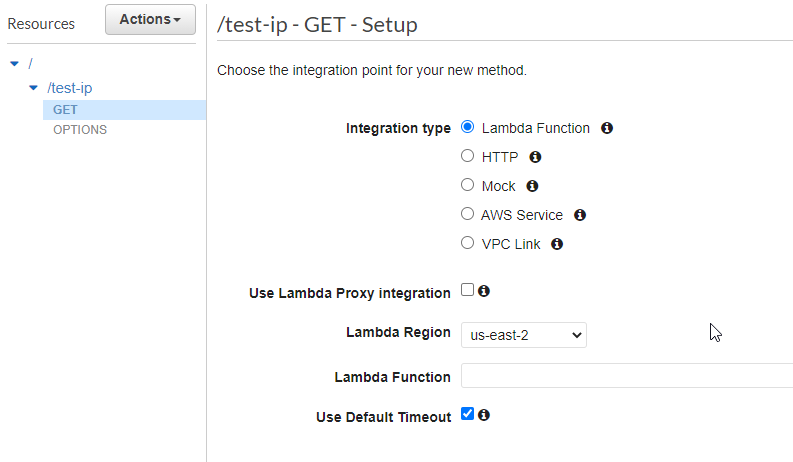
Do not select Lambda Proxy Integration because we want to override and map in some of the request parameters that the proxy does not include automatically. I wasted a lot of time from other blogs and StackOverflow advice that the proxy integration maps everything you need to the lambda function. It works fine for other workloads, but not for this one.
Enter the name of the stub function that you created just before this.
Accept the Add Permission to Lambda Function dialog
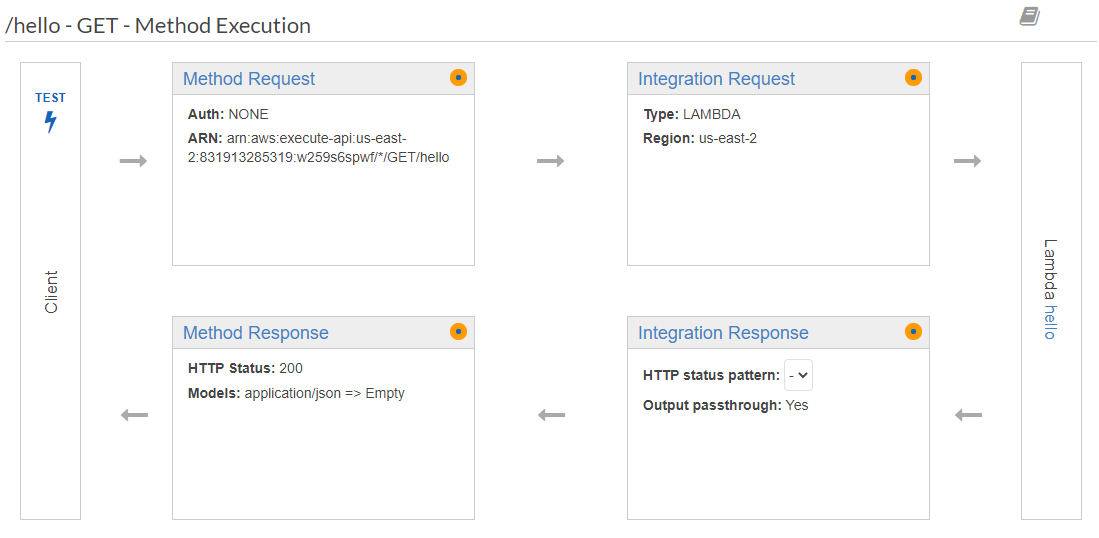
Edit the Integration Request (the box in the upper right)
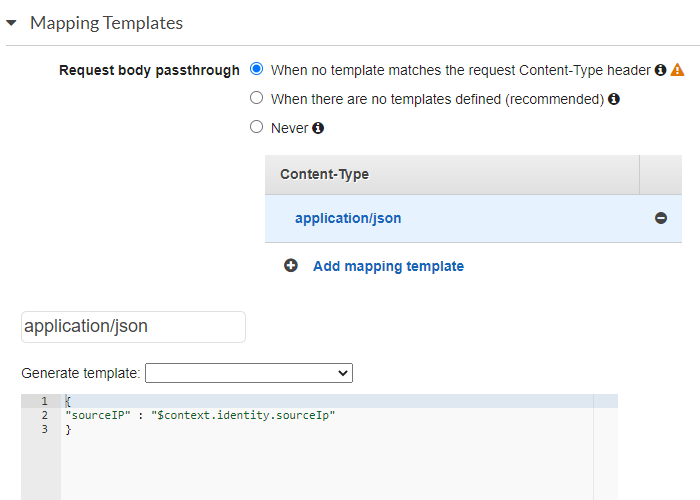
Expand the Mapping Templates and click Add mapping template for application/json and click the checkbox button
Select No, use current settings
Click on application/json and enter this into the template box:
{
"sourceIP" : "$context.identity.sourceIp"
}
Click Save
Click the Actions menu and select Deploy API
If this is your first time deploying, I recommend naming the stage v1. This comes up all the time on api development, that when you first build your api you think you will always be backwards compatible forever. Getting a version in at the beginning makes this easy to support down the road changes when you decide to put in a breaking change.
If you are using a custom domain, now is the time to go back and map this api and stage to the custom domain.

For More Mappings
{
    "stage" : "$context.stage",
    "request_id" : "$context.requestId",
    "api_id" : "$context.apiId",
    "resource_path" : "$context.resourcePath",
    "resource_id" : "$context.resourceId",
    "http_method" : "$context.httpMethod",
    "source_ip" : "$context.identity.sourceIp",
    "user-agent" : "$context.identity.userAgent",
    "account_id" : "$context.identity.accountId",
    "api_key" : "$context.identity.apiKey",
    "caller" : "$context.identity.caller",
    "user" : "$context.identity.user",
    "user_arn" : "$context.identity.userArn"
}Lambda Function
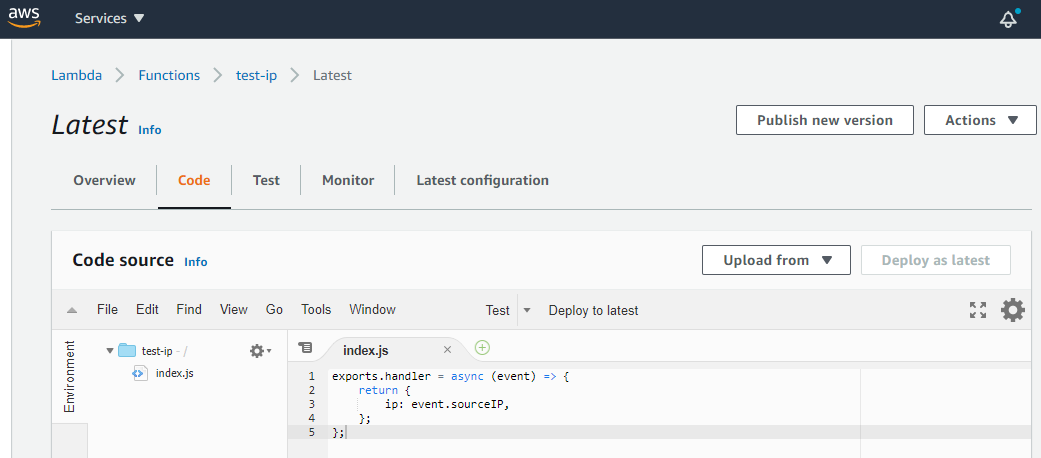
Now the lambda function doesn’t need much logic, just to read the event context and return the output as JSON. I’ve used Node.js 12.x here, but you can really use any language.
Go back to the Lambda page in the AWS Console and select Functions in the left sidebar
Click on the new lambda you created
Click on the Latest link
Switch to the Code tab and enter this
exports.handler = async (event) => {
    return {
        ip: event.sourceIP,
    };
};
Click Deploy as latest
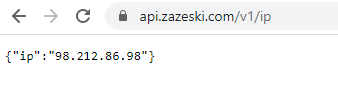
Now at this point, The result will look like:
https://api.zazeski.com/v1/ip/
{"ip":"123.123.123.123"}Plaintext Transformation
Now I often use this endpoint with shell/bash scripts and while this simple JSON isn’t hard to parse, not all systems have jq installed or all scripts want to use a grep or awk transform to get the useful ip part. What if this endpoint could also send the IP as raw text.
Now some developers get very upset if an API has inconsistent output formats, and I completely understand that frustration which is why we generated a JSON output first. But for practical use, let’s use a second API Gateway endpoint to transform this to just the raw text using the same backend Lambda function.
https://api.zazeski.com/v1/ip/text
123.123.123.123Back in the API Gateway, if you create a new endpoint under the existing resource and map it to the same lambda function as above. You will again have to setup the Integration Request as above, but now we need to make a mapping on the Integration Response.
Expand Mapping Template
Click Add mapping template and enter application/json
Set the template to:
$input.path('ip')Click Save
Select the Actions dropdown and pick Deploy API
You should now have an endpoint that is just plaintext with the IP.
Mounting USB exfat drive on Ubuntu
Upgrading to 10G Ethernet in 2020

I'm a 35 year old UIUC Computer Engineer building mobile apps, websites and hardware integrations with an interest in 3D printing, biotechnology and Arduinos.